Christmas present shopping for mom can be so challenging! Don’t worry, as we have the greatest selection of DIY Christmas gifts for mom! We advise giving mum a gift that you literally hand-crafted particularly for her because it’s true what they say about homemade gifts coming from the heart.
A homemade gift is a guaranteed method to demonstrate to the receiver that you took the time, care, and effort to make their present. You’ve taken the effort to produce something with your own two hands in addition to taking the time to obtain the materials for a DIY project.
We compiled a list and chose what we believe to be the greatest Christmas presents for mom. Please feel free to look through everything as you might find the perfect Christmas present for your mother there!
Best DIY Christmas Gifts For Mom That Are Cheap, Unique & Fun
You’ll love making these DIY Christmas gifts for mom because they’re easy to make and inexpensive.
1. DIY Knit Sweater

Look no further if you’re looking for a chic wrap that will keep your mother toasty on frigid winter nights. Today, we’re providing a really simple guide for making a stylish wrap with light sweater knit fabric and buttons.
Naturally, you’ll need sewing knowledge and a sewing machine to do this project independently. In contrast, if you’re not up for the challenge, you may definitely get away with purchasing a knit sweater from the store because your mother will still adore it even though she knows it was made by you!
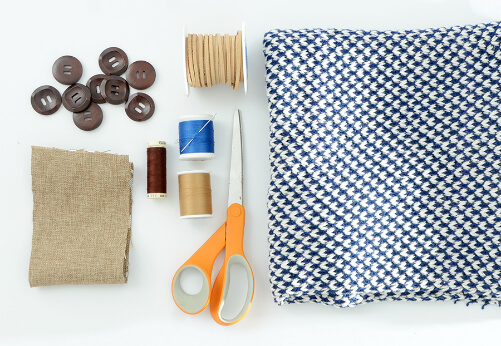
# Material:
- 1 yard of sweater knit material
- A scrap
- 5-7 wooden buttons
- 2 feet of suede cord
- Coordinating thread
- Needle
- Scissors
- Sewing machine
# How to make
Step 1: First, cut and hem the knit fabric for your sweater.
In order to hem the entire perimeter by hand and conceal the raw edges, cut the fabric to 45 by 27 inches for a size small. Cut it to 50 x 32 inches and hem it in the same manner if you want to make a size medium. A big should measure roughly 55 by 37. Before hemming, be sure to drape the fabric over yourself to ensure that it fits properly.
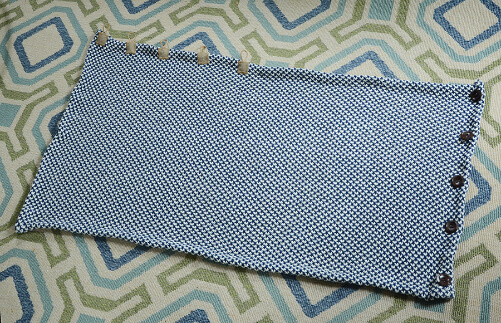
Step 2: Stitch your buttons on the right side’s shorter end.
With the use of safety pins, spread them out evenly along that edge. Each one should be stitched to the fabric using brown thread. For a reference on the layout, see the third image.
Step 3: Make your button loops.
- Cut a piece of suede that is about three inches long and one inch square of burlap fabric. In order to make sure that one of your buttons can easily slide through it, loop it and hold it with the cloth as shown above.
- With the loop facing up, tack it to the top left corner opposite the buttons. Four additional loops should be pinned to the right with the same spacing as the buttons, after measuring the distance between your buttons.
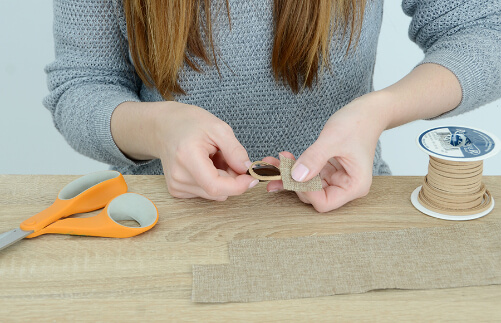
- Each square’s border should be sewn using a broad zigzag stitch. To avoid breaking your needle, stitch slowly when you pass over the suede cord.
- Trim all of your extra threads before sewing the additional loops to the right of this one. Then you’re done!
2. DIY Seed Bead Necklace
Seed bead necklaces are DIY Christmas gifts for mom that are amazing, and this particular one is lovely. It’s an effortless way to express your love and caring with a stunning necklace that’s also incredibly simple to make. Furthermore, your mother could only need the seed beads to fall in love with you once more!
It’s a fairly simple craft to construct, but you will need some practice with the round-nose pliers. Other than that, making the necklace shouldn’t be that challenging.
# Materials:
- seed beads
- eye pins
- head pins
- chain
- pliers
- round-nose pliers in 2 sizes
- pliers
# How to make a seed bead necklace
DIY Seed Bead Necklace – How to Make a Statement Jewelry Piece
Step 1: String the beads
Get the head pins and the seed beads ready, and then let’s begin so that they are all set to go. The idea is to use the color of the beads to form a V shape.
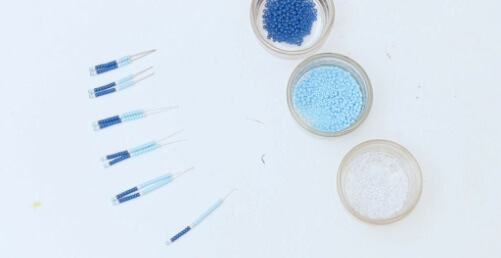
There will be 11 head pins filled with beads, all except one of which will be doubled. Therefore, we’ll have five sets of head pins strung together with beads and one independent pair.
One light blue bead will be your first, then eight dark blue beads, one white bead, and one more light blue bead.
The number of the light blue beads will rise as we continue adding them following the white bead. Four light blue beads will be on two of the pins, six will be on two, eight will be on two, ten will be on two, and fourteen will be on the last pin.
Step 2: Roll the head pins
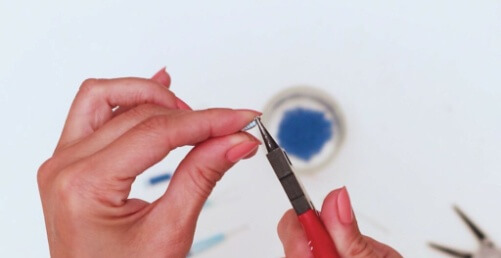
The wire must then begin to roll on the head pins. Grab the round-nose pliers, then take each headpin out individually. Turn the wire to form a loop by positioning the pliers’ noses just above the spot where the seed beads are located. Be sure to trim the extra wire before completing the loop.
Grab a pair of pliers and trim the extra wire in the headpin. The wire should be turned continuously until a loop is formed. You can keep spinning the wire even if your estimation of the distance to the beads was inaccurate.
Step 3: Create the necklace
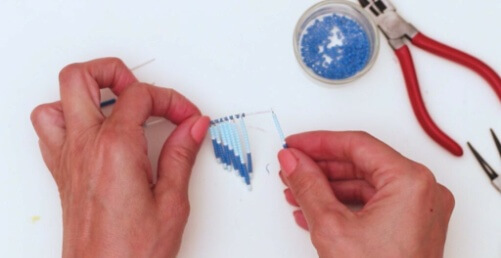
You must carefully arrange the pins in this pattern if you want to make anything attractive. First, we affixed a pin to the necklace with four light blue seed beads. A pin with six light blue beads was next added, followed by a dark blue bead, and so on.
After each headpin, don’t forget to apply the dark blue bead.
The pattern will look nicer and be more cleanly executed if the loops at the end of the head pins are rolled as near to the beads as feasible. Additionally, the number of beads will determine the length of the pins rather than how long you let the wire be. The design will become more symmetrical as a result.
Step 4: Attach the chain
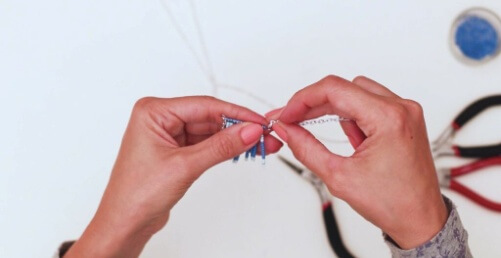
Grip the chain and also push one of the eye pin’s links. Get your round-nose pliers after cutting a little portion of the eye pin wire using your pliers. Using the pliers, bend the wire, and then create a loop. After you’ve pushed the chain link to the desired location, you want to shut the loop.
Next, flip the necklace over and unlatch the eye pin’s loop with the round-nose pliers. Using the same round-nose pliers, insert the link from the opposite end of the chain into the loop and then secure it.
3. DIY Dreamcatcher
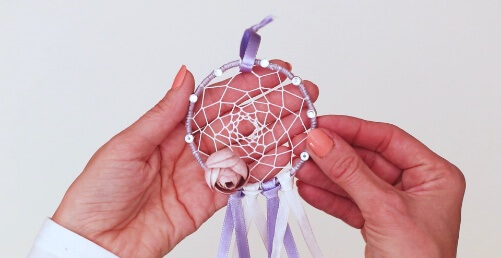
People often use dream catchers as protection from nightmares. These woven-string hoops are used as charms for babies’ protection since they are believed to resemble delicate spider webs. We decided to make a dreamcatcher since we think they are particularly endearing.
Anyone could purchase what they need without having to spend too much money in order to please their mother because the materials needed are simple and affordable. Additionally, your mum will be able to hang the dreamcatcher in any part of the house or in her bedroom.
# Materials
- Metal hoop
- Purple yarn
- White twisted yarn
- Strass
- White and purple silk ribbon
- Artificial flower
- Scissors
- Hot glue
# How To Make A Dreamcatcher
How To Make A Dreamcatcher – Easy and Beautiful
Step 1: Glue the yarn into the metal hoop
Cut a long piece of yarn to begin. As you don’t want to add a piece later, make sure you leave room for error. Start looping the yarn around the metal hoop after applying some hot glue. Once you’ve coated the previous layer with hot glue, keep adding more.
Make careful to tie a knot once you’ve finished wrapping the yarn. You could also use a tiny dab of hot glue to hold it in place. Any surplus yarn should be cut off, then it should be untangled from the hoop.
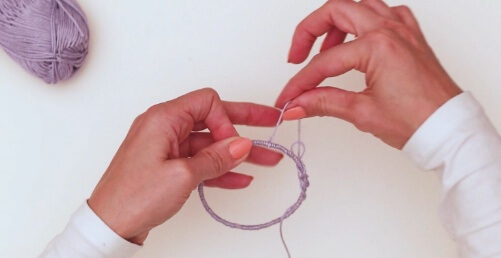
Step 2: Start Creating Loops
Make a tight knot with the white twisted yarn. Continue on a little bit after leaving just enough yarn for a tiny loop. Repeat the technique by passing the yarn under the first thread. Make sure the loops are spaced evenly apart.
Carry the thread downward once the initial set of loops is complete. Each loop should be threaded with yarn. A shaky dreamcatcher will result from pulling too tightly or too loosely, so find the right balance.
Carry the loops until there is just a tiny circle left in the center. For the thread’s security, tie a knot. You prevent the knot from moving, make careful to tie it as closely as you can to the thread.
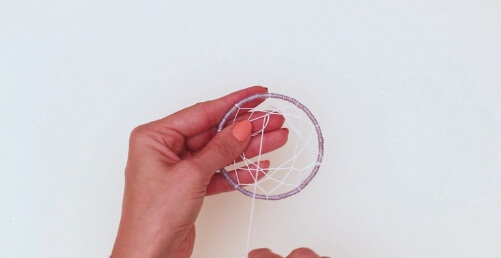
Step 3: Decorating the dreamcatcher
You can start embellishing the dreamcatcher now that the base is complete. Silk ribbons in the colors white and purple will be used. These ribbons will be used to secure them to the bottom of the dreamcatcher. Fold the fabric according to how long you want the flowing ribbons to be. Cut four of these to a size that is close to uniform.
Select the area where you wish to hang the dreamcatcher from and mark it as the top. Locate the two lowest surrounding loops by moving to the other side of this location. One of the ribbons should be taken, folded in half, and inserted through a hole. Then, like in the drawings, pull the ends through the loop.
Once you have a different pattern, repeat the technique with the other three ribbons. The midpoint of the lower portion of the dreamcatcher will be marked by two ribbons in one loop and two in the other.
Retrieve your scissors and trim the ends of the ribbon to be about the same size. The dreamcatcher will look more balanced as a result.
Find the balance point at the top with a spare ribbon that has been cut. In order to hang the dreamcatcher, leave a loop after you tie a knot in the ribbon and push it through that space. This loop can be as big as you like it to be, depending on your demands.
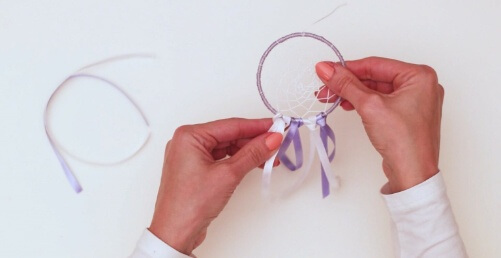
4. DIY Bath Bombs
How simple it is to create your own bath bombs will surprise you. It’s similar to following a recipe to prepare a dish.
Bath bombs are enjoyable because you may experiment with a variety of ingredients. Before filling the mold, you might place dried flowers in the bottom, or you could experiment with various aromas and hues. Even better, use two colors and construct each bomb using half of one and half of the other!
# Material
- 1 cup of baking soda
- 1/2 cup of cornstarch
- 1/2 cup of citric acid
- 1/2 cup of Epsom salt
- 3 teaspoons of water
- 3 teaspoons of coconut oil (melted)
- 8-10 drops of orange essential oil
- 1 tablespoon of orange zest
- Food coloring (optional)
- Bath bomb mold or another mold
# How to make
Step 1: mixing ingredients
The dry ingredients should first be combined in the bowl. This comprises Epsom salt, cornstarch, citric acid, baking soda, and cornstarch.
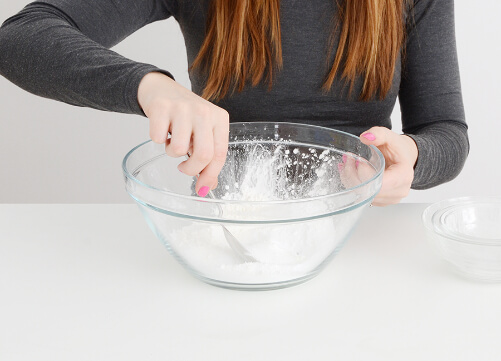
Step 2: mix well with a spoon
With a spoon, thoroughly mix it up, making sure to incorporate all the ingredients.
Step 3: melting in the microwave process
Melt the coconut oil in a separate tiny glass bowl using a microwave. In case the bowl is hot, be sure to take it from the microwave using an oven mitt. Add the essential oil next.
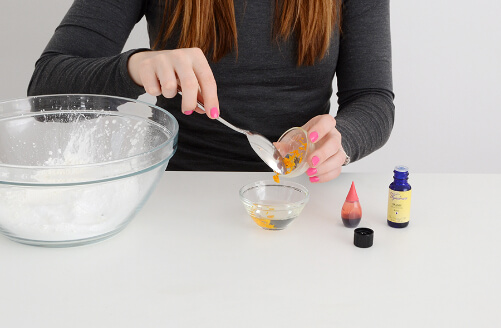
Step 4: Add orange
Next, add 1 tablespoon of orange zest to the coconut oil mixture. If you would want to add food coloring at this time, do it now. Also, don’t forget to add water. The components should be thoroughly mixed.
Step 5: mix all ingredients
Very gently pour the wet components into the dry ones while stirring with the other hand.
Step 6: Smooth sand
Gently stir everything together until combined. It should have the texture of moist sand. The mixture’s lack of moisture startled me, but it was great. The greatest test is to try to roll it up with your hands. You are ready to place it in your molds if it holds together.
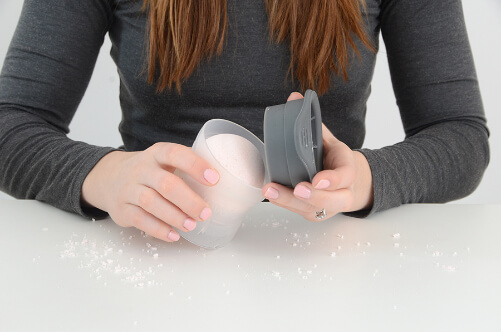
Step 7: Prepare the mold
Fill the mold to the brim with the mixture, then tightly press the two parts of the form together. Set the bath bomb on a paper towel to cure after delicately removing each side of the mold. Use the remaining mixture to create a few more, then leave them to cure overnight. They will be firm and prepared for usage when you wake up in the morning.
5. DIY Rustic Twig Heart Wall Art
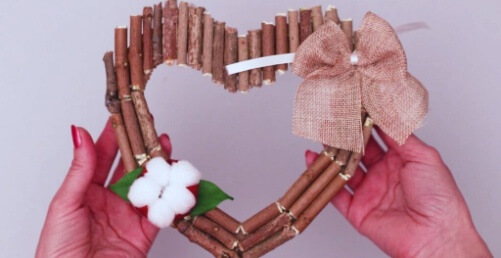
If you apply your imagination, you can make crafts out of literally anything non-perishable, so here is an idea for what you can make with some tree branches, fake leaves, and other items you may have laying about the house.
You only need to use super glue to arrange the twigs; this is one of the DIY Christmas gifts for mom that doesn’t call for any unique abilities or artistic talent. Don’t forget the rope you’ll need to hang your work of art on the wall, as well as any craft paints!
# Materials
- Cardboard
- Pencil
- Scissors
- Silk
- Ribbon
- Branches
- Armsaw
- Jute Ribbon
- Glue Gun
- White pompoms
- Brown crepe paper
- Artificial leaves
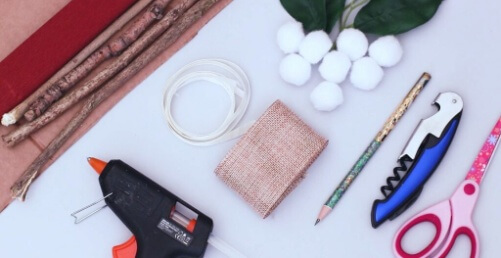
# How to make the Rustic Twig Heart Wall Art
Step 1: Cutting the Base
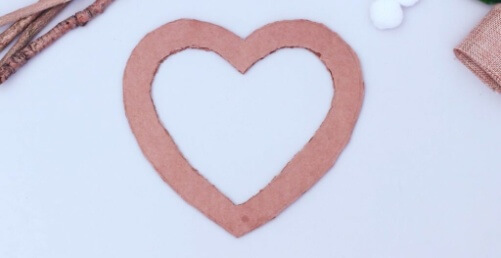
You’ll be making a cardboard heart cutout to serve as the foundation of your wall art. A heart stencil can be printed, or you can directly trace it with a pencil on the cardboard piece’s surface. Create a heart that is larger on the outside and smaller on the inside. The smaller heart should be by one to one and a half inches from the larger one.
Cut the big heart first, and then the little heart inside it, with your scissors.
Step 2: Cutting & Gluing the Twigs
It’s time to cut the branches and twigs you’ve gathered into pieces that are about 0.5 inches longer than the width of your cardboard heart using an arm saw or a cutter knife. For instance, your twigs should be between 2 and 2.5 inches in length if the heart cut-out is 1.5 inches.
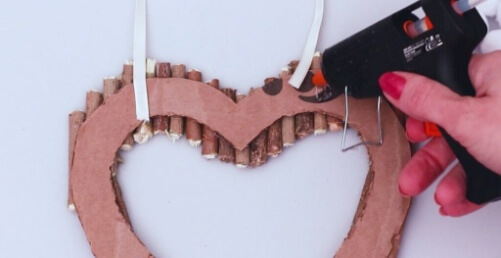
Once all of the twigs have been cut to size, use the glue gun to attach them to the cardboard heart cutout. Vertically glue the first twig after applying a line of glue to the foundation. Then, carry out the procedure once more, bonding each additional twig next to the previous one.
Applying pressure will help the twigs adhere to the cardboard heart.
Step 3: Gluing the Hanging Ribbon
Measure out a length of ribbon that will be suitable for hanging your wall art, preferably one that is light in color or that complements the hue of the twigs.
The ribbon piece should be cut to the desired length.
Select the two symmetrical locations on the wall art’s reverse where the ribbon’s ends will adhere. To make the ribbon end stay, dab some glue on it and press it gently into place.
For the other end of the ribbon, repeat the procedure. Once more, be certain that the loop you build is symmetrical to prevent your wall art from hanging unevenly.
Step 4: Adding the Final Decorations
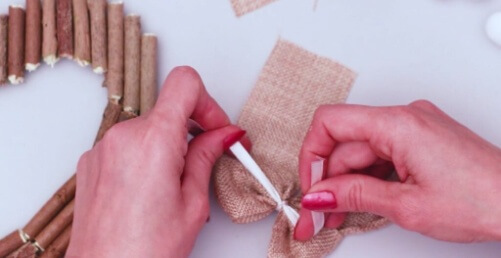
Make a ribbon out of your jute fabric by grabbing it. Once you’re finished, trim the remaining ribbon so that its ends are of a comparable length.
Using some of the ribbons you still have from when you constructed the hanging mechanism, continue by tying the ribbon in the middle. The contrast between the two hues ought to be stunning.
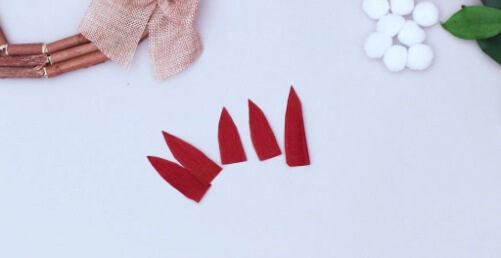
Take your brown crepe paper and cut out some pieces that resemble leaves. For the following stage, about five pieces ought to be plenty. With your pencil, begin by outlining the shape on the paper.
Make the cuts with the scissors after grabbing them.
It’s time to adhere the white pompoms to the crepe paper leaves. Put a small amount of adhesive on one of the pompons, then adhere to another. Repeat the process to create a larger group of white pompons, and then glue them all together.
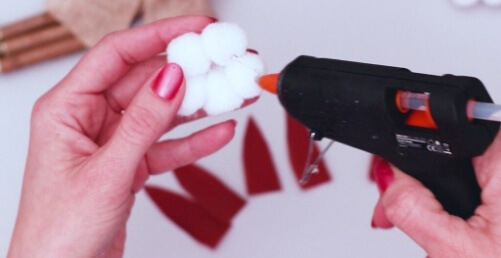
When the pompoms in the shape of flowers are complete, start adhering the fake leaves to the back. The initial crepe paper leaf should adhere to the center of the pompom bulge after a dot of glue has been applied. Continue until all five crepe paper leaves have adhered to the pompoms’ backs in a star-like design.
On one side of your heart-shaped twig art, glue the leaves together. Next, adhere the pompoms to the artificial leaves’ tops. After that, take the jute ribbon and adhere it to the side opposite where you glued the cotton-like ornamentation.
You May Concern:
Conclusion
Above are guided by giftOMG to help you make some of the best DIY Christmas gifts for mom. The finest method to demonstrate your love for mum is with Christmas gifts. Don’t worry about what kind of gift to buy your mother this year or how much money to spend on her. More than anything, a small but considerate act would be appreciated. We hope that this post will assist you in selecting the ideal Christmas presents for mum.

