Looking for DIY Christmas gifts for your boyfriend? Surprise your loved one not only with these unique gifts but also with your kindness and DIY crafting abilities!
The finest time to make your loved one feel special and even more connected to you than usual is during Christmas. Choosing a lovely present for your lover can be difficult. So why not build a gift yourself for the man you love rather than running to the stores in search of the ideal present?
DIY Christmas gifts for your boyfriend are unique and special. They beautifully capture your emotions and truly convey your affection. The top 10 handmade Christmas presents for boyfriends are provided below in case you are unsure of what to make for him.
7 Tips For Making DIY Christmas Gift for Your Boyfriend
You don’t have to spend a lot of time or money on DIY Christmas gifts for your boyfriend. In fact, there are some really easy ways to do so.
1. Personalized Gingerbread Men
You might try creating a batch of personalized gingerbread men that are designed to look like him if you’re looking for DIY Christmas gifts for your boyfriend that will also allow you to demonstrate how talented a cook you are.
The fantastic thing about this specific idea is that there are so many gingerbread recipes available that it will be quite simple to choose one that will suit his preferences.
In actuality, frosting them to give them a vague resemblance will be the trickiest aspect of preparing these personalized gingerbread guys.
Ingredients
- 3/4 cup (150g) brown sugar
- 3/4 cup (180mL) Golden Syrup*
- 3 oz (90g) butter
- 2 tbsp (12g) ground ginger
- 2 tsp (4g) mixed spice
- 1 tbsp (13g) bicarbonate of soda
- 4 cups (500g) plain flour
- pinch of salt
- 2 eggs, beaten
Making the dough
Stirring constantly while the butter melts, combine the sugar, golden syrup, butter, ginger, and mixed spices in a saucepan. Take the food off the heat and let it sit for two minutes.
In the meantime, sift the salt and flour into a sizable bowl. Create a well in the middle.
Until it dissolves, stir the bicarbonate of soda into the heated syrup mixture. The mixture will take on a frothy, airy appearance.
In the flour well, add the beaten eggs and the syrup mixture. Stir everything together with a spoon. You ought should have a sticky dough once all the flour has been incorporated.
The dough should spend 30 minutes cooling in the refrigerator after being wrapped in plastic wrap.
Baking your biscuits
Set the oven’s temperature to 350°F (180°C).
The dough should be rolled out to a thickness of 1/4 inch (0.5 cm) on a floured surface. Cut out any pattern you like, such as stars, hearts, or gingerbread men. Use a cookie cutter or a sharp knife to cut the dough by hand.
Place the cookies on a baking sheet lined tray. Bake until golden brown. Allow cooling on the tray for a few minutes before moving to a rack to finish cooling.
2. Homemade Keychains
Keychains are entirely cosmetic, so as long as they look beautiful, it doesn’t matter what you build them out of. However, if you want them to be functional as well, you may go ahead and shape them so that you can clearly see what the keys are for.
However, by adding useful items to your keychains, such as USB flash drives, bottle openers, or even miniature pocket knives for emergencies, you may truly make them functional.
Here’s what you’ll need:
- Tassel Fringe
- Lever-Back Key Chain
- Scissors
- Hot Glue Gun and Glue
How to make your keychain
Step 1: Open the tassel fringe packaging and take the leather staples out. Cut 14 inches from the bottom of the first piece of fringe on one of your leather tassels once you’ve taken both of them off.
Step 2: Take hold of your key chain and insert the fringe you just cut through the bottom loop.
Step 3: To create a loop, add glue to the bottom section of your fringe and attach it to the top section.
Step 4: The last step is to apply glue to the piece of fringe that you just bonded to the base and press it down to close the loop.
Step 5: Cover the top portion of your fringe from top to bottom with a liberal amount of glue.
Step 6: Start rolling your fringe on the side that is attached to your keychain.
Step 7: When you have finished rolling your tassel, take the remaining fringe and adhere it to the first piece by aligning the ends. Your second fringe should now have glue on the top, so roll it down until it is completely covered.
These are, after all, the ideal Christmas presents for a guy who values preparedness wherever he goes.
3. A Scarf
It’s Christmas and it’s freezing outdoors, so it’s one of the most useful presents you can give him.
Because all you need to make a scarf is some yarn and some knitting needles, it is incredibly simple to follow the instructions for producing one. You can refer to the video above to get started from the first steps.
Your challenge then becomes making the proper color choices, as your lover could not like all of them.
In fact, you could go a step further and knit him a matching hat and pair of gloves as well, giving him a gift from you that will keep him warm even when you’re not there.
Furthermore, it’s alright if you don’t know how to knit; with a little perseverance and effort, you can actually pick up the skill in just two days, at which point you’ll be able to create the ideal handmade Christmas presents for your partner.
4. Apron
Materials
- Printable Apron Design File
- flour sack towel, 33″x38″
- black woven trim, about 1″ wide
- sewing machine
- pins
- scissors
- freezer paper
- iron
- pencil
- fabric paint
- sponge brush
How to make your apron
Step 1: Set up the towel or fabric such that the top edge is 33 inches long and the hems are facing the opposite direction. The top corners should be folded in 11′′ from either side and should curve downward 15′′ on the outside. At the corners, pin.
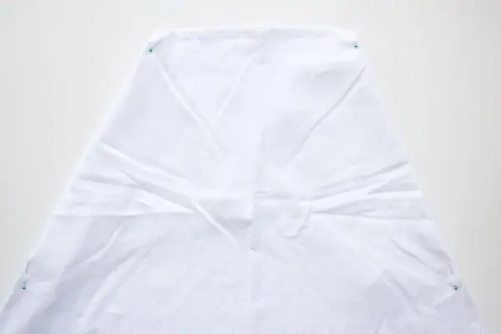
Step 2: To meet the fold, cut horizontally on both sides of 38′′. The incision should be 5 inches wide and 15 inches long.
Step 3: Where the sides were cut in, sew a straight stitch hem on the backside. Then, stitch the diagonal folds in place. Cut off the extra. This will make up the apron’s upper section.
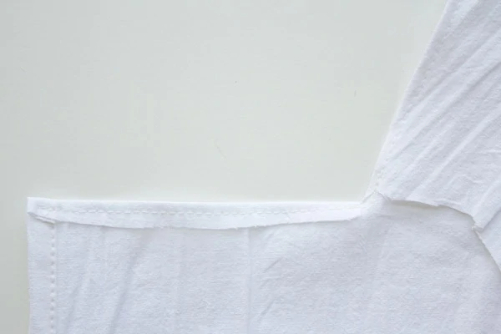
Step 4: Your measurements could be different for the waist ties and neck strap. I made three 20-inch-long pieces of black trim. Sew both sides down with a straight stitch, pinning the first piece under the top of the apron’s outside edges.
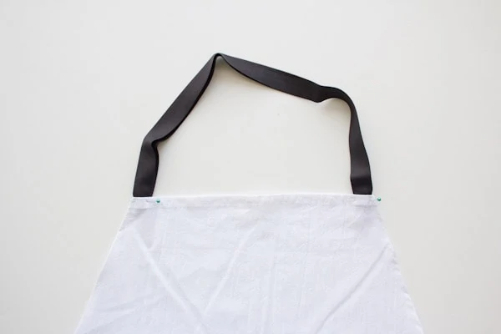
Step 5: The final two should be used to stitch one to either side of the waist (the area where you cut in horizontally and hemmed). One end should be pinned behind the apron and stitched straight across. On the loose end, quickly fold it over to prevent unraveling.
5. A Gift Basket of Snacks
Gift baskets in general make excellent presents because they can contain a variety of items. It’s still a success even if the recipient doesn’t like one or two of the products because he will still appreciate the other stuff.
Because I believe they make such a wonderful present and are so useful, I adore the concept of creating and delivering food gift baskets. Does anyone else have a full house around the holidays? And who in the house wouldn’t benefit from having some cheese, crackers, chocolate-covered almonds, cranberry relish, and wine?
If he enjoys snacking on snacks, you could also give him some naturally prepared beef jerky or maybe some fried pork belly snacks.
Overall, your partner will adore your gift, and even if he doesn’t, it will be a great justification to have him over and cook for him!
6. Romantic love letters

With these sexy love quotes, hot notes, and beautiful DIY printable sexy and romantic love letters, you can flirt and tease your partner this year and make him clamor for your attention. It’s now up to you to maintain the passion because we’ve made starting it simple. Therefore, switch things up and include a sexy couple quote printable if you feel like you and your sweetie should become personal. Put it on his pillow, car, or even the bathroom mirror! Because going above and beyond to express your love and adoration for him will definitely motivate him!
7. Diy Explosion Box
A boring, ordinary card can be elevated with an exploding photo box! A homemade explosion box is essentially a gift in and of itself! What fun, huh? The gift is a tiny box with over twenty sides that may be decorated in various ways when the lid is removed. Think of drawings, sketches, romantic notes, and even stickers!
You’ll need the following things to make your own box card:
- Printable exploding box template in PDF
- Scissors
- Adhesive: double-sided tape or wet glue
- four paper clips (optional)
- Anything else you want to use to adorn the package? stickers, drawings, colorful paper, favorite quotations, etc.
How to make your own box
Step 1: Print the templates
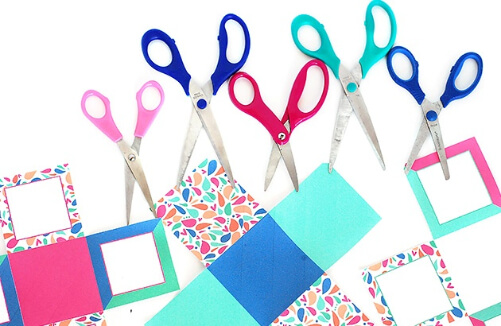
You can download and print the free PDF printables. Three layers of slightly varying sizes, a lid, and an exterior layer are all included in your explosion box templates. All you have to do is print and cut out these papers because they are all labeled and measured.
Step 2: Fold your explosion box
Fold the box card template’s square edges individually with care. By switching up the color for each square, we made it quite simple for you to identify where to fold. To make your lines clear and straight, use a ruler. It will be crucial to keep everything organized throughout this endeavor.
Step 3: Glue the Layers Together
All of your layer components must now be assembled. Place layer 2 such that it is nested on top of layer 3, starting with layer 3 at the very bottom. The center white square of layer 2’s backside should be adhered to layer 3’s center white square’s front side using adhesive.
Apply the same procedures to join layer 1 to layer 2. Make sure they are neatly centered before folding the sides in once more.
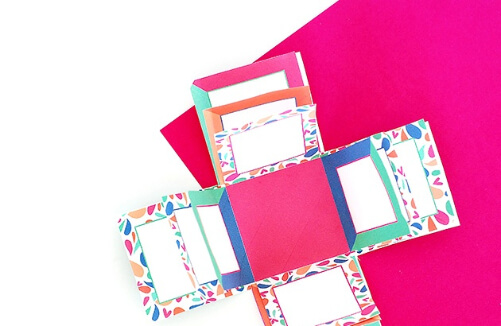
Step 5: Make Your Lid
Finally, you need to create the lid so that you can close the box. Fold along each of the lines indicated by a new color or pattern. Then, coat each of the pink squares with glue.
The most challenging stage is now at hand. Pinch the corners of a pink corner square so that the patterned sides meet and the pink sides are pressed together by the glue. This will change the pink square inside the box into a little triangle. Repeat with the other three pink corner squares, holding in place with a paper clip while the adhesive cures.
Put your lid on top to hold everything in and fold the sides of your exploding box toward the center. Everything should release explosively when the lid is lifted!
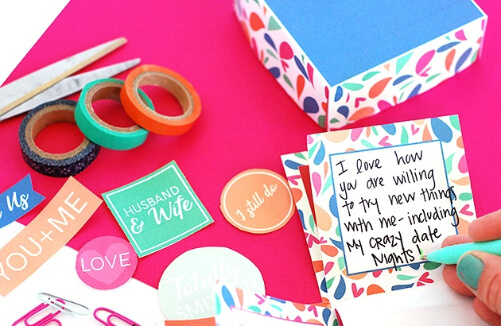
Step 6: Customize Your Explosion Box
You may now customize your exploding box card!
8. DIY Stenciled T-Shirt
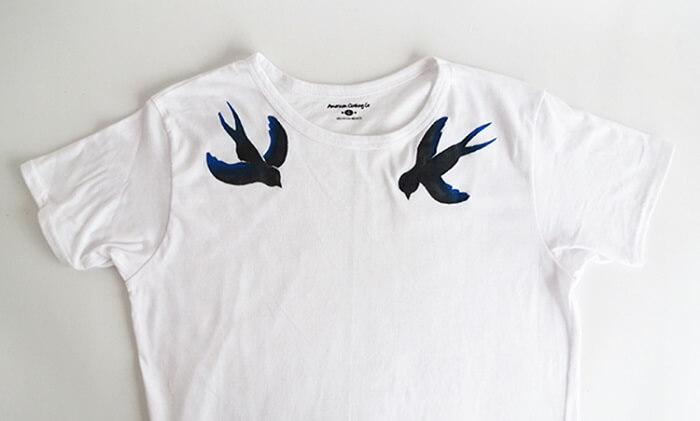
Create a personalized T-shirt to give to your lover as a holiday present. Try writing your initials, a personal message, or a favorite quotation on it!
Painting your t-shirt is a fantastic way to personalize it. If you don’t have an artistic soul, it’s not always simple! But did you know there was a simple method to achieve it? Use freezer paper as a stencil. You only need a few things and this shirt design instruction for it; it’s incredibly easy!
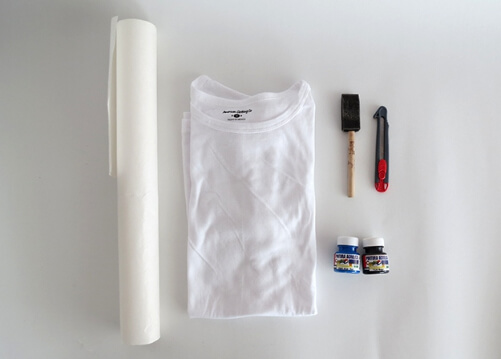
What You’ll Need:
- freezer paper
- foam brush
- fabric paint
- cutter
- iron
How To Make A Stenciled T-Shirt
Step 1: Draw Your Design
On the side of the freezer paper that doesn’t have plastic wrap, draw your design. On the freezer paper, your design can also be printed directly.
Step 2: Cut
Take care when cutting out the freezer paper with your sketched pattern.
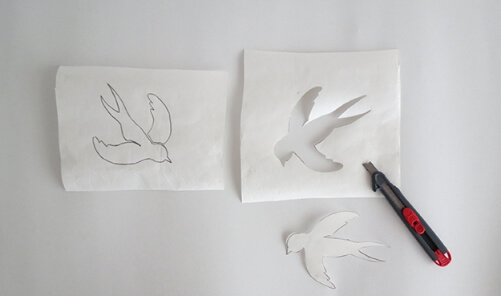
Step 3: Position
Place your stencil on the shirt, making sure the plastic-wrapped side is up against the material. To make your stencil adhere to the t-shirt, iron it.
Step 4: Slip A Piece Of Cardboard
To stop the paint from bleeding through the back of your t-shirt, tuck a piece of cardboard or newspaper into your shirt.
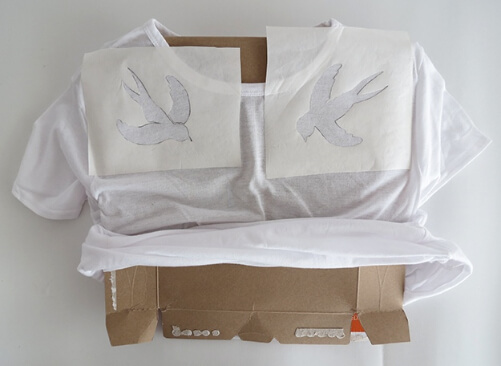
Step 5: Paint
Start painting your t-shirt using a foam brush. Use a little paint at a time and move slowly.
Step 6: Remove
Remove the stencil with caution once the paint has dried. Simply give it a gentle pull to remove it.
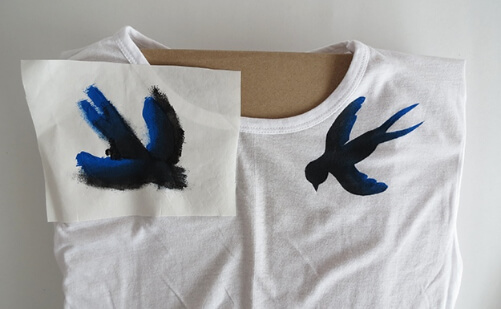
It’s really that easy, don’t you think? Any t-shirt design you like can be created. It’s the ideal personalized t-shirt for a special event. Try using your favorite saying or a meaningful anniversary.
9. DIY Carved with Initial Candle
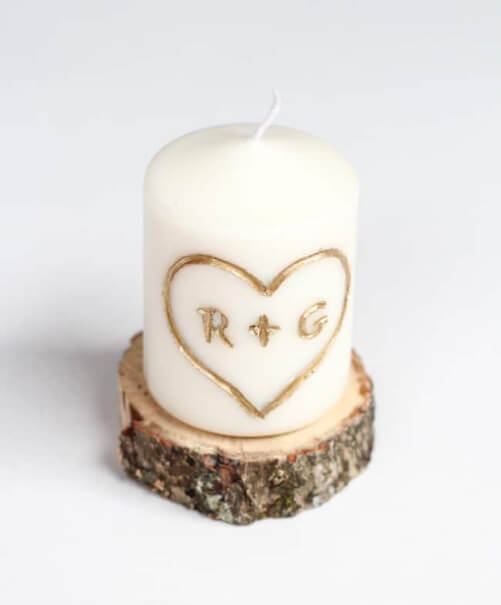
It’s simple to make this DIY candle with initials and it makes a wonderful handcrafted, personalized gift for everyone in your circle.
Making a gift for that special someone is the best method to express your affection. Because engraving your initials on a candle is the epitome of unending love!
Supplies Needed
- Candle
- Linoleum Cutter
- Gold Leaf Pen/Ball Point Pen
- Tape
- Design
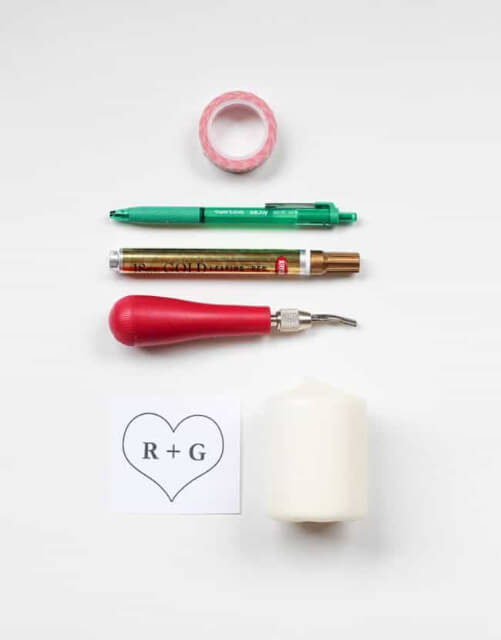
How to make your own candle
Step 1: Your design should first be taped on a candle. When you draw over it, you don’t want it to slide off! If you need more of a guidance, you can create the design in Photoshop or freehand.
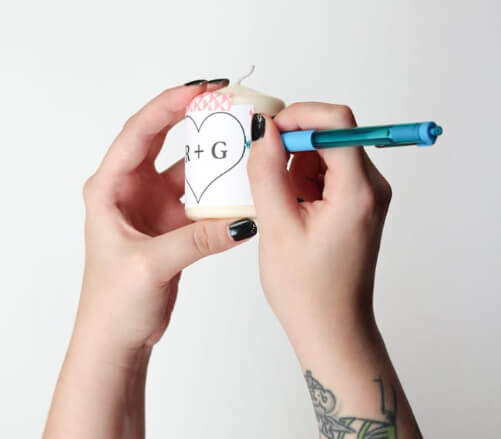
Step 2: Apply a ballpoint pen to your design and trace it over firmly. Be particularly cautious because this will create the basic path you need for carving.
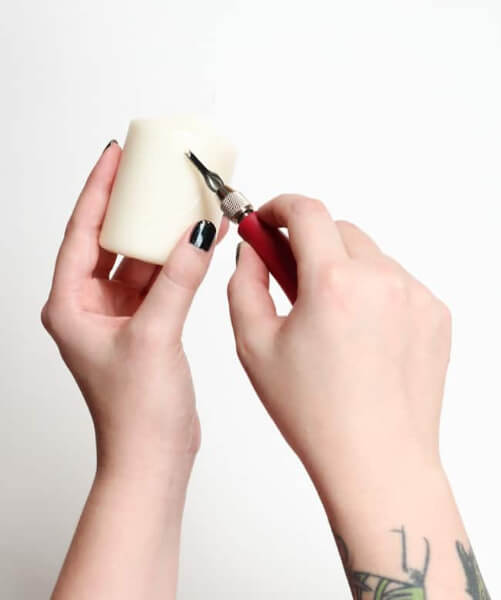
Step 3: Utilize the linoleum cutter to go over the first trace. The line should be broad and deep enough to accommodate the gold leaf pen’s tip.
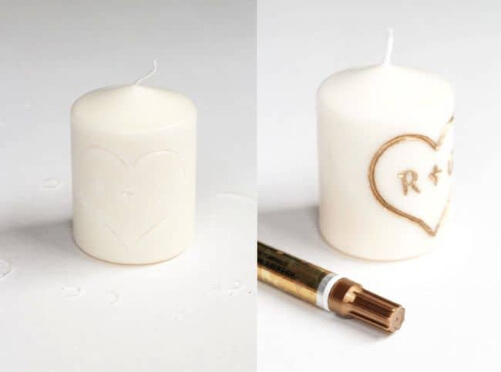
Step 4: Utilize a gold leaf pen to go over the interior of your carving. To get the desired degree of gold, you might require a second coat. After drying, give your sweetheart a gift.
10. Secret Pocket Pillow
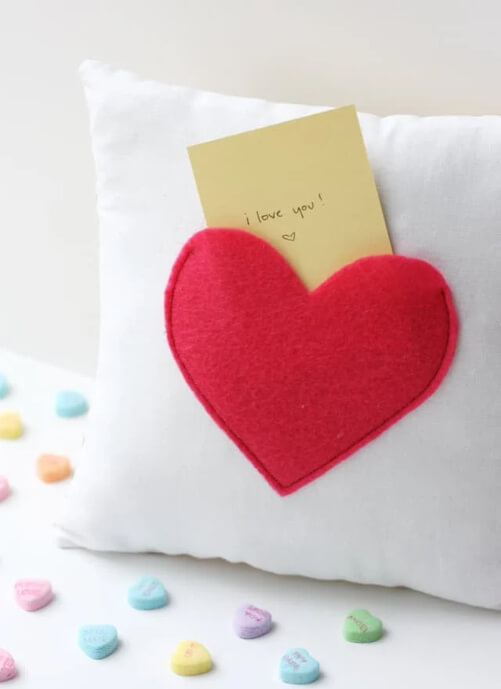
Suppose your man awoke next to this?
With materials you most likely already have, this secret pocket pillow comes together so quickly. Use a heart for Valentine’s Day or make a tooth fairy pillow by cutting out a tiny felt tooth. Make it now so you can keep your loved ones’ tiny notes inside all year long!
Supplies you will need:
- One square of fabric for your backing
- One square of fabric for your front
- A piece of Heart-shaped felt scrap
- Matching thread for your heart
- Stuffing
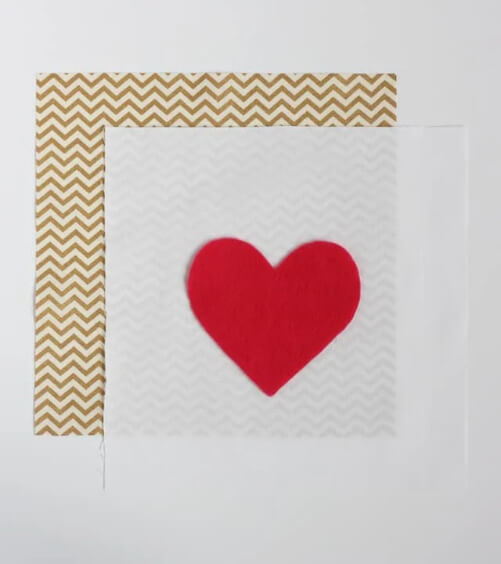
How to make your pillow
Step 1: The first step is to sew your heart onto the fabric of your cushion front. Only stitch from slightly higher than halfway on both sides of the heart, close to the edge, to create a pocket.
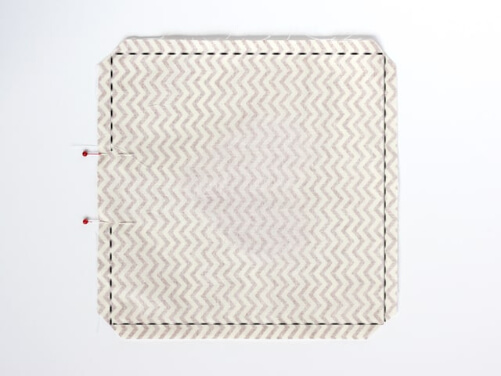
Step 2: Right sides together, attach the pillow front and back pieces, leaving a gap a few inches wide, along all four edges. I used a seam allowance of half an inch. Then, round the corners.
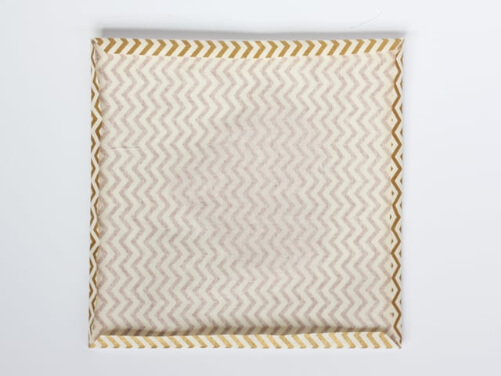
Step 3: Turn your pillow out after pressing the seams open (doing so will make closing the opening much simpler). You may make your corners appear nice by using a point-turner or chopstick.
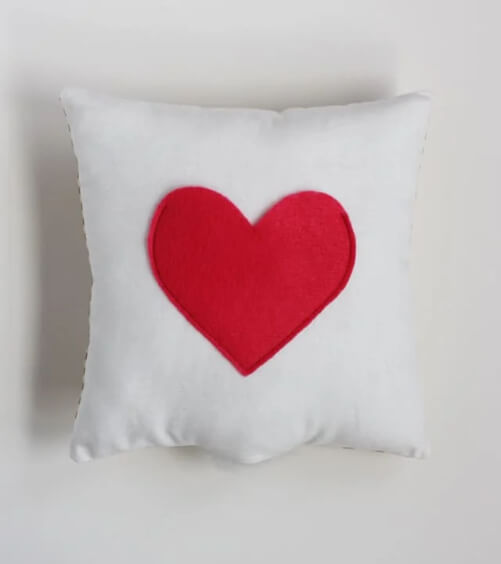
Step 4: Now stuff stuff stuff that pillow! Make sure you pack the corners and the area where the opening will be sewn shut with adequate material.
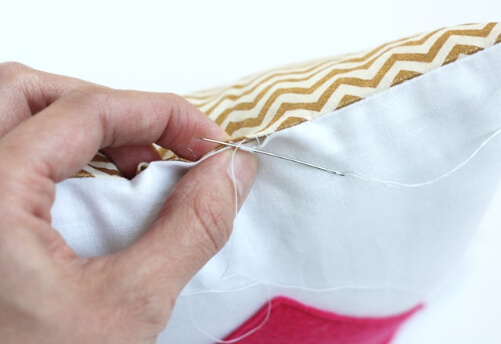
Step 5: Using a hand needle and matching thread, stitch closed the opening. Try to keep your stitches hidden.
Now you’re ready to write a little message, stick it in your pocket, and tuck your pillow where your Valentine will discover it! See how simple that was?!
*** Reference:
Conclusion
These are some of the top DIY Christmas gifts for your boyfriend from giftOMG Choose one of these presents to enhance the holidays for you and your loved ones. Instead of adding another Polo to his collection, personalize his wardrobe with a unique DIY gift. You don’t have to put in endless hours to produce a work of art. If you put some thought into a homemade gift for him, he’ll realize how much you care.

